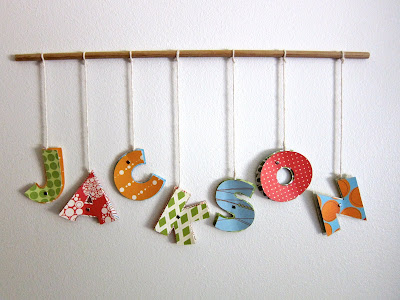
Did you see these on my old blog?


Sadly these two are no longer. Hike decided he wanted a closer look, took them off the wall and ripped them up.
I cried.
Well, now I will show you how to make your own. Yippy! :)
What you'll need:
- Coordinating paper, cardstock may be better, but it really doesn't matter.
- eyelets. One for each letter
- brads, one for each letter
- yarn, string, ribbon = whatever you want to use to hang your letters with
- wooden dowel or other item to hang letters from
- sawtooth picture hanger, small.
- silent setter for making holes and setting eyelets
- jigsaw
- sander
- drill and really small drill bit
- hammer
- pen
- scissors or cricut machine
**Quick note. I put this tutorial together from three different names I was making, so that is why all the pictures are different. Also, some pictures were taken at night, and thus are not the best. Hopefully you can still get the picture of what to do ;)
First, pick your paper. My letters end up about 3" in size, and I cut squares about 4" square to cut the letters out of. You want to have two designs per letter, a front piece and a back piece.

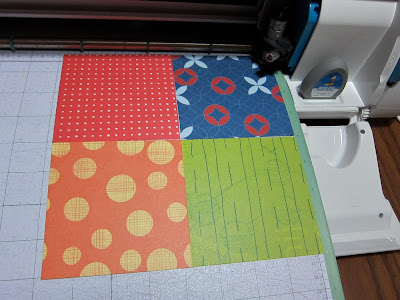
Here are my squares. Two for each letter.
I cut my letters out on my cricut which makes it very easy.

If you don't have a cricut, or want to cut them by hand, simply trace your letters on the backs of the paper you are using and cut. (If you do this you don't have to cut squares. Just simply trace/draw the letters on the back of the paper and you can save a lot of paper this way, and not have so much scrap paper left over.) Make sure that the letter that is going on the back is a little bit wider in every direction than the letter in front.

see how the back paper 'outlines' the front paper.
Once you have all your letters cut out you want to line up your letters how you want them to hang. Unless you put your eyelets in the direct center of each letter, they will tilt one way or another. Here is where you want to decide which way you want them to tilt so you know where to place your eyelets.

***Tip: Larger letters hang heavier. Like H, M, W, etc. If you place the next step right on the outer corner it will tilt a LOT, more than I might like anyway, so take this into consideration.
Punch a small hole first, my mom gave me this silent setter. It can be difficult at times, but definitely is worth it! Thanks mom!

Then place your eyelet.

I put the nice side of the eyelet on the back, because it will show more than if it is in the middle and gives it a more finished look.

Here you can see the backside of the L.
Once all your eyelets are set, line up your letters ontop of each other and centered. Punch a SMALL hole in the very very center of the letters.

Then place your brad to hold them together.


Pretty easy huh?!
Now you are ready to hang them.
Lay out your letters again and arrange them as to how you want them to hang in relation to hight. Cut your string, or ribbon, or yarn, or whatever you want to use with enough left over to tie knots in each end (cut it longer than you think so you have room to adjust).
Thread one end through the eyelet in each letter and tie whatever kind of knot you want. (I don't know what this knot is called that I use. Here's how I do it:
Thread the string through the eyelet (or around the dowel), wrap the short end of the string around the long end twice. Make sure your wraps are going back towards the letter or dowel. Then when you come around the third time, bring it over your two loops, go underneath them and back up. Pull the strings tight and your done! You can know slide it up and down the other knot.
Next we'll skip over to preparing your dowel. I bought a small dowel from Lowe's for about $1.
Line up your letters again so you know how long you want it to be. Mark the desired dowel length,
Cut it and sand it down a little so each end is nice and smooth.
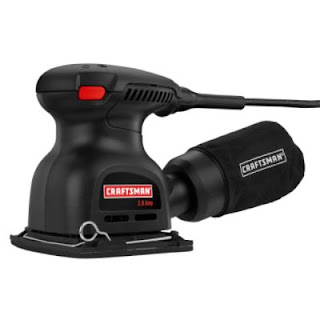
Yup, I really used these tools.
You could probably improvise though if you don't have them.
Make sure your blade is moving really fast, and move fast through the dowel. Otherwise it seems to rip up the end and make a jagged mess.
Then take your sawtooth hanger and place it in the center of your dowel. Mark where the holes are for the nails.
With the smallest bit you have drill two tiny tiny holes where the nails will go. Go in far enough so your nails don't bend when you hammer them in. If you don't drill holes it is VERY difficult to get your nails to go in straight!
Then attach your sawtooth hanger.
Now your ready to hang the letters. Arrange them one more time exactly how you want them to hang. Take the ends of each string and tie around the dowel in the adjacent spot.
Tip: Don't clip the ends of the string until you have all letters tied onto the dowel. You may need to make the strings longer or shorter, and once you clip the ends, it's a lot harder.
Place a nail in the wall and you're ready to hang!! :) Walla! Beautiful!
If you want to add a little dimension to it, carefully bend each letter vertically right around the brad. The top paper towards the front, the back paper towards the back.


****
Variations:
- If you don't want to attach the sawtooth hanger, you can simply tie a string around the center of the dowel and hang from the ceiling or other hook.
- If you don't want to use a wooden dowel, you can use a hanger, a tree branch, a long pencil, a ruler, string, or whatever you have around the house.
- Don't want your name hanging on the wall? Do your last name and hang it on your front door? Or make one or two together to say some kind of greeting like: Happy Birthday, Happy Halloween, Merry Christmas, Welcome, Brush your Teeth (for the bathroom), etc.
Have any questions or need help??? Just leave a comment and I'll get back to you! :)
If you make this, will you send me add a picture to the flickr group???
http://www.flickr.com/groups/fromblankpages/
http://www.flickr.com/groups/fromblankpages/
I'd love to see the variety you come up with
and would love to share them with everyone as well! :)
Please let me know if you link to my blog. :)
Love it but don't want to make it yourself??? I'm adding a custom listing for this item to my shop. :) I'll let you know when it's up It's up! and you can go buy it and I'll make it all for you! Just let me know what colors/style you want and your set!
{please contact me for a custom order}
{please contact me for a custom order}
Thanks for stopping by!!


OMG These are adorable!! Great idea!
ReplyDeleteSuch a cute idea! Definitely a To-Do for the next kiddo, as my little man already has one and I like variety :) Stopping by from Just Something I Whipped Up and following along!
ReplyDeleteLove it! so so cute!
ReplyDeleteThese are great! So simple but cheery. Thanks for sharing ... I've posted a link.
ReplyDeleteWhat a great twist on the typical name letters! Fantastic, thanks for the tutorial!
ReplyDeleteThese are the cutest things I have seen in a long, long time! I love the patterns you chose for each one!
ReplyDeleteAnd thanks for stopping by Sew Super Sweet yesterday, I apprecaite it!
Those are DARLING. Seriously. I would have cried too. Loving this idea. Thank you thank you for linking it up!!
ReplyDeleteI thought these little mobiles were just adorable, and I featured them here. So cute!
ReplyDeleteWhat a cute idea! I love these!
ReplyDeleteThis is beyond cute! Thanks for the awesome tutorial!
ReplyDeleteStopping by from Get Your Craft On. Have a wonderful weekend!
Very cute! Posted about them on the Dollar Store Crafts facebook page: http://www.facebook.com/home.php#!/pages/Dollar-Store-Crafts/161233564682
ReplyDeleteThis is totally a cute idea! I'm gonna try and make these for each of my boys to hang on their wall!! Also, I'm telling all my friends about it through Facebook! and then linking it on our family blog when I'm finished.
ReplyDeleteI'm so glad you linked to this post in the one you linked up to A Crafty Soiree, this is such a great idea. It's relatively easy to do and customize. I love making personalized gifts, FUN!
ReplyDeleteSuper cute!! Thanks for the tutorial!! May attempt!
ReplyDeletehttp://ninetomidnightdesigns.blogspot.com/
Adorable- Thanks for auditioning for American Crafter!
ReplyDeleteVery cute! Love all the difference variations!
ReplyDeletehappy crafting!
Linda
Super Cute! Good Luck in AC!
ReplyDeleteJessica-Mommy Creations
Very cute and great photos. I did my grand daughter's name in a simple wall quilt. Names are fun.
ReplyDeleteLove this! Can you tell me which cricut cartridge you used? Thanks!
ReplyDeleteThanks! I used the Mickey font cartridge. Or Mickey mouse? I can't remember what it's called exactly. :)
ReplyDeleteHave you ever tried to hang them vertically? Just wondering how they'd look, I have a super skinny wall in my daughter's room that I wanted to put her name on, just not sure how the letters would tilt. Thinking about putting an eyelet on each end and putting the string in between them from top to bottom?
ReplyDeleteI would LOVE to make this mobile, but the Mickey Font Cartridge is retired! UGH!! I was wondering if anyone new of a font that is close to this...I need the letters to have some 'fatness' to them like the Mickey Font. I am new to the Cricut, so I am appreciative of any advice! Thank you!!
ReplyDeleteHey, i made my version of this:) Thank you so much for sharing. I made it last summer for a friend's little guy but finally blogged about it today and thought i'd leave you a note, incase you wanted to take a look. Thanks again!
ReplyDeleteblogged here.
http://lazygirlsworld.blogspot.com/2012/07/diy-handmade-gift-for-little-guys-room.html