Home * Patterns * Tutorials * Made It * Our Story
Showing posts with label Church. Show all posts

Wednesday, September 17, 2014

Invite a Friend Day

In my church ward, or congregation, of The Church of Jesus Christ of Latter Day Saints, we have been asked to invite a friend to come to church with us this Sunday. Since we only moved to Idaho a few months ago, I haven't really made any friends that are not already of the LDS faith, or Mormons. As I received a reminder text about this from the missionaries this morning, I instantly thought of inviting my friends who are all over the world! You! :D 

I want to invite you all to church this Sunday. Although I won't be there to attend with you, the church is the same all over the world. One of the greatest things about the church in my opinion. What I learn in church will be the same that you will hear. HERE is a great outline of what you can expect when you visit the church. And since it can be a little daunting going somewhere new for the first time, by yourself, of course you can always bring a friend, or a few, or your family members, I will personally call the ward you will be attending and let them know you are coming and that you are my guest. :) (Or you can always just sneak in and sit in the back and be the strange visitor. It doesn't matter. Everyone is welcome ALL the time!)

In order to let the ward know that you are coming as my friend, you've got to help me out, and I'll help you out to! 

On Mormon.org you can click under the link that says VISIT and then Find A Church, or simply follow this link


It will bring you to a map showing you where there are church buildings. See, they are all over the world!


You can enter your address, or just your city, state, and country in the search bar at the top. Enter your street address to help you find the closest building to you.


It will show your area and the church building(s) that are closest. This is the town I live in, and there are four church buildings here.


If you click on one of the church icons, it will pull up the address and the different meeting times that are held in that building. I clicked on my church building, and there are two wards that meet there. One at 9 and one at 11. We go at 11, not out of choice, but because that is the ward my address is assigned to. It makes it easy to keep in contact and serve those that are closest to me in my town, rather than drive all over town to meet with my ward members. You are welcome to go to any time you'd like to. Sometimes there is only one ward that meets in a building, so there may not be options of times. Depending on where you live (like in Utah where there is a high concentration of members) there can be 3 or 4 wards in one building.


If you would like me to phone ahead and let them know that I will be having a guest attend church that day, let me know the information that shows when you click on the church building you will be attending (the church building address, city, state, country, and the name of the ward and time). And let me know what time you will be going to. I will be able to find the information to call them and let them know you are coming so that you can feel welcome when you visit. 


If you are in a different country, it works the same way!! I might have a harder time letting them know you will be there, but I will do my best! Maybe they will speak English, or I also speak German and my husband speaks French and Malagasy if you happen to want to visit the church in Madagascar. We'd LOVE to come with you if you do!  Lol. ;)


If you have any questions, let me know! If you'd like to visit in the future, you are always welcome!! I'd be happy to call ahead anytime if you'd like too! Just let me know! 


You can learn more about our beliefs at Mormon.org, and it is available in many languages. This post is not in anyway affiliated with the church, nor am I am official representative of it. I simply a member of the church who would like to invite you to learn more about us and our beliefs.


IF YOU ARE IN UTAH, Please note: This Sunday is a rare Sunday where they will not be holding regular Sunday meetings. They are dedicating the newly rebuilt Ogden Temple, and will be sharing the temple dedication in place of the regular meetings. You must be a baptized member of the church and age 8 or older to attend. You can learn more about temples HERE. If you would like to attend regular church meetings another week, you are more than welcome to.


UPDATE to add: Why am I posting this on my quilting blog?

My faith is a dear part of my life and makes up everything that I am. Just as quilting is a part of my life, and at times I feel like I am going out on a limb to share a creation that I have spent hours upon hours on making, the Gospel of Jesus Christ has that same special place in my heart. Thinking about what it takes to share the most precious part of who we are with others, I am reminded of this quote by Robert C. Oaks,

"Consider that you are invited to a friend’s house for breakfast. On the table you see a large pitcher of freshly squeezed orange juice from which your host fills his glass. But he offers you none. Finally, you ask, “Could I have a glass of orange juice?”
He replies, “Oh, I am sorry. I was afraid you might not like orange juice, and I didn’t want to offend you by offering you something you didn’t desire."
Now, that sounds absurd, but it is not too different from the way we hesitate to offer up something far sweeter than orange juice..."
I do tend to keep my private life private, and not flood my blog with pictures of my sweet children and other avenues of my life. But I love the opportunities we have to learn about and get to know people all over the world, and learn more about their cultures and what makes them special. I hope you won't be offended by my invitation to try something sweeter than orange juice. And if you aren't interested, just ignore it! It is after all just an invitation. :)

Diane

Sunday, October 7, 2012

I'm a Mormon!

I'm sure some of you know I am a member of the Church of Jesus Christ of Latter-day Saints (aka, a Mormon, aka LDS. they're all the same thing). Some may not. Some of you may know members of this church, and some may not. I'm sure some of you are members. I'm sure everyone has heard of at least one "Mormon", Mitt Romney, it's kind of hard to ignore him right now. Anyway, the point of my post today is to share with you an opportunity to learn a little bit more, if you are interested. (all links shared are to the official webpage of the church.)

The fastest overview of some of our most important beliefs can be found in the Articles of Faith. Joseph Smith wrote the Articles of Faith in 1842 to help people who are not members of the Church understand how The Church of Jesus Christ of Latter-day Saints is different from other churches.

The sixth Article of Faith reads, "We believe in the same organization that existed in the Primitive Church, namely, apostles, prophets, pastors, teachers, evangelists, and so forth."

Just like there were prophets in the Old Testament, Adam, Noah, Moses, we believe that God has called modern prophets today. Joseph Smith was a prophet. We have a living prophet today, President Thomas S. Monson. He has two counselors, you can see them here. We have 12 apostles, just as Christ called apostles to help lead His church. You can see who the current apostles are here. Pretty awesome.

 Come listen to living prophets

Why I want to share this with you now, is because twice a year we as a church, and the world, have the opportunity to listen to these men, and other leaders of the church speak to us in what we call General Conference. It is 4 - 2 hour sessions that are held over the first Saturday/Sunday in April and then again in October. Yep, this weekend (sessions start at 10 am MST and 2 pm MST). The speakers study, ponder and pray about the messages they share. Some talks are specific to members, and some are specific to non-members (Elder Russell M. Nelson is a good example of this from yesterday mornings session). Some may be specific to certain age groups, life circumstances, or gender, but all are full of wisdom and answers, and often promises. Watching/listening and later being able to study the talks in the Ensign/Liahona (a church magazine), always helps me find direction and wisdom for my own life. It doesn't matter how old you are, who you are, or where you are. It doesn't even matter what language you speak (the church is in over 150 nations and is translated into many languages), God is your God and He loves you. He wants you to be happy!


You obviously don't have to view any of these links, videos, or conference. I am grateful that I have a blog where I can share so many of my activities and projects with you, as well as a peak into my family life on occasion. Here is one of those times when I want to welcome you to come past the computer screen and get a little bit deeper glance into my life and who I am. :) If you have questions, don't hesitate to ask. If you want to meet more Mormons, or read more about us on a more basic level, I invite you to visit Mormon.org, where average members share their stories, experiences, and a bit more about the church. There are musicians, actors, politicians, garbage men, bloggers, teachers, athletes, Olympians, etc.


I hope you have a wonderful weekend!

 Diane

Tuesday, November 15, 2011

VT message: It's Better to Look Up!

Since we had General Conference last month, we can pick what we want to share for our visiting teaching message. As I was looking through the different talks this one stood out to me, "It Is Better to Look Up" by Carl B. Cook. It is such a good talk.


Anyway, to make it fun I decided to put together a cute card. I like quotes and although my collection of them is everywhere, I still like them, and suppose that others do to. If you want to use it you are more than welcome to download it here. :)  (just a warning. the font looks weird on the page, but when you download it, it looks a lot better.)


oh, and I made this with a free mini kit shared by MyMemories (they have a great digital scrapbooking software, along with lots of digital papers, kits, etc. - check out my sidebar for a code to save $10. I'm really not trying to advertise here, just letting you know where I got the cute stuff from! and trying to help you save money). ;) They have Friday Freebies on facebook.


Diane

Saturday, September 24, 2011

Vinyl-licious

My cricut has been a busy bug. lol.

Ok, quick bug, as in I'm bugged. (ok, I really don't mean to use bug so much when referring to the cricut, but I just am!) I don't know if any of you out there have/use one, but it's useful. Well, I also LOVE Make the Cut! (MTC) It's the best software out there, but last summer cricut/Provo Craft suede MTC and told them, and any other 3rd party software, that they can no longer make their software compatible with the cricut. So that is really buggy for me because until I get a different cutter, I can not update my software (which has improved leaps and bounds since then) or my cricut (which I don't really care about, because I'm sure they haven't improved much of anything). :)  Anyway... I still like having it and using it, and luckily it stills works. So here I am showing you what I've done:


My sister is one of those Super Moms who does everything! Literally. She's the PTA sec, is the Team Mom for her sons football team, Primary President for her ward, I'm sure is involved with her daughters soccer team - but I can't think of anything specific. Anyway, and the list goes on. So, she enlisted me for the beginning gift of the football team, which turned out super cute!

She had me make all the boys names, along with their jersey numbers, and some symbols to represent their team, etc. to put on some water coolers. I love cutting out vinyl. Taking off all the extra stuff after it's been cut and it just looks so clean and sharp. I don't know, I like it.

Anyway, she sent me a picture of it all finished. Don't they look great?!

S__CE73

She also made some for all the of the cheerleaders (yes. It is an 8 year old football team that has cheerleaders. lol. Gotta love Texas sports!)

S__9CEF

So that's that.

We also had our Young Women's Standards night the end of last month. It was kind of crazy, but for our gift for the girls, I made up a little vinyl saying for them that they could stick on their wall, or mirror, or whatever. It is quoted from the back of the For Strength of Youth pamphlet as a reminder of the choices you are making, "Am I living the way the Lord wants me to live?" I made one as an example and put it in a frame to hang on my wall. :)

DSC_0386

Fun times! Fun vinyl!
Sometimes I wished I knew when/if we were ever going to move so I could put some stuff up on our walls if we really are going to be here forever. :) One day... I'm remaining hopeful. :)


Diane

Saturday, April 9, 2011

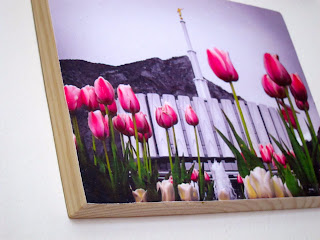
Made It: Temple Plaques

Temple Plaques


During General Conference (you can listen or watch it here - http://lds.org/general-conference/sessions?lang=eng), President Monson talked about Temple's and said,

"To you parents of young children, may I share with you some sage advice from President Spencer W. Kimball. Said he: “It would be a fine thing if … parents would have in every bedroom in their house a picture of the temple so [their children] from the time [they are] infant[s] could look at the picture every day [until] it becomes a part of [their lives]. When [they reach] the age that [they need] to make [the] very important decision [concerning going to the temple], it will have already been made.”

I liked that. We have one picture with the temple hanging in our house, but it's definitely not clear that it is a temple. 

 This is one of our wedding pictures, obviously. It always makes me smile!


These plaques are super easy to make! You can use any picture, drawings (kids drawings), paintings, or fabric to cover the board. Even add some embellishments, vinyl, or whatever else when your done. I used 8" plywood boards that I got from Lowe's, I had the boards already cut from when I was making plant presses (they are about 5" wide maybe. You can ask the people at the hardware store to cut them down to size after you pay for them which is really convenient). Make sure to sand them so they are really smooth.  Find whatever picture you want to use adjusted the pictures to be just a little bit bigger than your wood. I printed mine out on photo paper so they would look nice, and used mod podge to attach the pictures. First I did a layer of mod podge on the board and glued the picture on. Press out any air bubbles. Then turn them over (picture side down), trim the edges


Repeat on all sides. 
I cut a little bit into the picture/under the board so nothing is for sure hanging out.


 Then mod podge over the top to seal it. Carefully press out any air bubbles.  To finish them up drill a small hole in the back, slanted up, to hang them on.


Neil picked the Logan Temple of course.

Hunter picked the Salt Lake Temple... I love this shot!

And Jackson picked the Provo.


These really were super fast and easy to make, and the possibilities are endless!

If you want to use a temple picture, there is this site that has hundreds of pictures to choose from!
(http://www.ldschurchtemples.com/photographs/)


My Favorite thing about these... if my boys just happen to take them off the wall THEY CAN'T DESTROY THEM!!! Yeah! :) 

Diane


Monday, January 17, 2011

Made It: Children's Church Bag, Part 2

Two weeks ago I posted a tutorial on how I made my bags for my boys. (Which of course can be used for a million other things besides church bags. I've even used them already for bags when I didn't want to take everything in my purse. haha.)

But for the intended purpose, here are a few of the things I put in them for church, and a few fun ideas that I haven't put together yet. :) I have a LOT of links to some wonderful ideas, so I hope you have as much fun looking as I did. :)


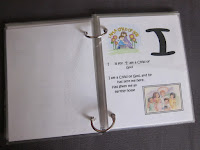
First of all, I printed out this cute ABC Church Book, from The Idea Door. It was super easy to cut and laminate with my YourStory machine. Then I just punched two holes in one side and used the  Loose Leaf  rings and here's a cute book. :


I think if I were to make one again I would change a couple of the pages to use different words, or maybe different descriptions, but this works and my boys like to look at it. :)


I also made a few manila folder activity folders that I found from this site well, I can't find it, but I know it's somewhere in the links at the bottom. I'll keep looking and update this when I find it. I like it because you can print them out black and white and color them yourself, or print them pre-colored, which I did and saved a LOT of time. :) How easy are these? Super. Print, laminate, cut, add velcro, tape to the folder, and your done! :)


After a bit of use I think I want to make these different too. I think if I can find more churchy stuff (like more bible oriented ones like Noah's Ark) than I would actually make a fabric book out of flannel. When the boys take the velcro off it's kind of loud, and I think if it were simply stuck to flannel it wouldn't be as loud. Plus they wouldn't have to match it up quite as exactly - which also means they'd have a little more freedom to play with them. Here's how I'd do it. Cut out flannel pieces that are two pages across. Trace the basic outlines onto the flannel and draw over them with a fabric marker. Then use crayon to color the pictures in and iron to set the color (I love that idea! so simple!). Make a fabric pocket on the facing page and label the activity. Sew the pages together and your done! :) (I think it would take a little bit more detail to make sure all the pages end up in the right places, but I think it would work pretty well.) The other thing with these books is that the pockets don't work very well. All of our Noah Ark animals are always falling through. It's impossible to keep the pocket taped on when you're always trying to reach in and get the pieces out. See...


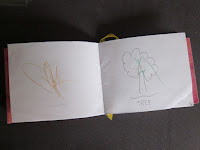
I also added a small handmade book for drawing. This was a practice book when I made all the books for the YW's last year - that's why it's pink and my boys are using it. :) On a couple of pages I drew some simple outline pictures for them to color. But mostly they just scribble right now.


That said, I also have some of these WONDERFUL Twistables Colored Pencils in there.
Crayola : Twistables Erasable Colored Pencils, 12 Assorted Colors/pack -:- Sold as 2 Packs of - 12 - / - Total of 24 Each
I love that they are washable/erasable, and if Jackson has a hold of them, we can just turn them down and I don't have to worry about him coloring on anything! I do really want to get the Mini Twistables Crayons though (I didn't know they had those when I bought these). Hunter likes to turn them out too far and then the tips break. I don't think I would have to worry about that with the crayons since they are SO thick!


I do also have another little book I put together. All it is are pictures of Jesus, and a few other pictures that are key to the Gospel, which I laminated, punched holes in and used the rings to hold together. I found these at the Church Distribution Center for very inexpensive, but I know you can also find some of them at Deseret Book. (Both places you can order online if you don't have one nearby).


I really like this, especially while we take the Sacrament, to help them know what we're supposed to be doing while everyone is being so super quiet. :) 


Ultimately we're trying to get away from bringing toys or fun stuff to church. We've decided that we want them to learn to be reverent and learn that it's important to be focused on what church is about. The husband is trying to get me to not bring anything, but I think a few things are alright. I think I might actually leave out some of the manilla folders that don't also teach, perhaps come up with some of my own stuff. But until then, here are a few more ideas and places you can go to find great ideas.


And of course when they get old enough to read, we'll add some scriptures in there too. :)

I really like this first book that is all about Jesus (or there is one that is on the Sacrament) - but my boys aren't old enough to read, so I think this will have to wait. (http://www.mormonchic.com/mommy/quiet_books.asp) Plus at this link there are more ideas, like the picture book that I made, a fabric quiet book that is pretty general (not churchy), and a photo book of your baby or family.


Links of all my bookmarks....

General Quiet Books:


Churchy Stuff (LDS and general Christian links):


The actual pdf files of ideas and things to download:


A few random links I had in my bookmarks that I know have some great stuff, but nothing specific in these links, just a lot more links:


If you have links to other websites or posts, or something of your own that you've made that fits here, leave it in the comments and I'll add it to my lists! :)

Thanks for stopping by! 
Linking up at these great parties ---> (check my sidebar for daily links)

Tuesday, January 4, 2011

Made It: Children's Church Bag, Part 1

***UPDATE: I've done some clean up on this pattern as well as made it into a PDF pattern, the Mini Tote Bag. You can find the pattern in my Craftsy Shop HERE. The pictures are the same as here on my blog, so if you want a bigger reference for them, hang around as you make your bags! :)


For, well, ever, until now, we've always brought a huge diaper bag full of books, toys, snacks, etc, with us to church to pacify our children while they needed to sit quietly. Well, that doesn't always turn into quiet time. A couple of Sunday's ago, a friend of mine told me about what one of the families do in our ward. They only let their children bring their scriptures and perhaps some paper or church books. That's it. Then she tells them BEFORE church that when they are reverent and obedient they receive blessings, which for them equals a treat or some reward when they get home. If they are noisy or misbehave during church they don't get that "blessing". I like this because it's not bribing! :) lol.

Anyway, Hunter has NEVER let me sit through church, not even when he was an infant, but in the last couple of months he has gotten a lot better, and I think he is ready for this. Jackson will do fine I'm sure since he's pretty mellow anyway.
And so I have started my next project: Church Bags!


Here I will give you my tutorial of how I've made my bags, and then in the second part, I'll show you the collection of things that I have made/found to put inside them. :) I think (hope) these will be a hit, and that they will like carrying their own bags. I also figure that they can be the ones to put the items inside them so they will already know that we don't have any snacks for them, and thus cutting down on disappointment and being loud when we tell them in church that we don't have any for them. :)

What you'll need:

2 coordinating fabrics (1 for the inside and 1 for the outside. you'll need about 1/2 yard of each fabric)
scissors
sewing machine
thread
straight pins
ruler or cutting mat and straight edge
and anything else you might need to sew with or cut fabric with


Cut fabric into the following pieces:

1 of each fabric:
     12" by 25 1/2" (for the main bag)

2 of each fabric:
     2" by 17"  (for the straps. This will make shorter straps for children, but long enough that I can still fit it on my shoulder in case I ever carry it.)

1 each of inside fabric only:
    6" by 13 1/2" - for larger inside pocket
    4 1/2" by 10 1/2" - for smaller inside pocket


Begin by: (backstitch every time you start and stop sewing)


A. POCKETS

click on photos to enlarge
  1. Take the pocket pieces and fold them in half, right sides together, hamburger style (do you remember that term from elementary school?!) :)
  2. Sew around the three edges with 1/4" seam allowance (SA) - not on the folded edge (A.2.a). Leave a 2" opening for turning on the side opposite the fold (A.2.b).
  3. Trim the corners
  4. Turn right side out and push out corners using chopsticks, bone folder or something pointed. Fold the opening under 1/4" and press/iron the entire pocket
  5. Along the folded edge sew a straight line about 1/4" from the edge
  6. Do the same thing to the next pocket piece

    B. INSTALLING POCKETS


    1. Lay the inside piece of fabric flat on your working surface, right side facing up. 
    2. Take your smaller pocket and with a ruler line up your pocket  2 1/2" from one short edge, and 4" from both sides. This will center your pocket on the one side. Pin in place at the four corners and along the long sides. (2a. I actually like to use my clear ruler in this step. I lay it on the top and adjust the pocket underneath it until it is centered and straight. I think it is a lot easier to line up this way.)
    3. Take your larger pocket, and on the opposite end of your fabric, line it up so it is 2 1/2" from the short edge and 3 1/4" from each edge. Pin in place as you did the first pocket.
    4. Sew each pocket in place by sewing 1/8" from the edges along the long side, bottom (sewing the opening shut) and the other long side, leaving the top open. I like to backstitch a lot at the top where I start and stop to give it a little extra strength, since little hands will be digging in them, I figure they could use it. :)

      C. STRAPS


      1.  Take one strap piece of each fabric and lay right sides together. 
      2. Sew along each long side with 1/2" SA, DO NOT sew the short ends closed
      3. Take a safety pin and pin one end of the strap, going through only one piece of fabric
      4. Push the safety pin inside the strap and work it down through to the other end, pulling the fabric in with it. This is a little tricky at first, but once you get started it should only take you 30 seconds to turn the whole strap! I love this method!
      5. Press your strap flat. (mine were a little lumpy. You can remidy this by either only sewing 1/4" SA (your straps will be wider), or cut your straps 1/2" thinner and sew with a 1/4" SA, or use something flat to run through your strap after turning to smooth it out. Or just leave it a little lumpy. It really isn't noticeable.)
      6. Sew along each side of the strap, about 1/8" from the edge. This will give it a crisp, neat look. (I forgot this step on the green bag, oops. ;) This step isn't dire, but it will definitely keep it staying flat.)
      7. Do the same thing with the other strap.

        D. MAKING THE BODY OF THE BAG
           
        1. Take the  outside piece and fold it in half, right sides together, hamburger style
        2. Sew along each long side with a 1/2" SA
        3. Crease the fold as well as you can with your finger
        4. Taking one bottom corner, we're going to square up the corner. (I don't know how to explain this really.) Try and get the seam line lined up with the very center of the bag bottom (where you creased it) - it should look like the picture, with the seam going straight down the center of the triangle.
        5. Line it up on your cutting mat, or using a ruler, pin it where the triangle is 1 1/2" across. Try and get it as straight as possible. (I like to lay it on my cutting mat, line the seam line up so it is straight with a line on the mat. Then measure where it is 3/4" on each side of the seam and mark with pins, or other marking tool.
        6. Sew across this line
        7. Cut the corner off, about 1/4" from your new seam
        8. Repeat this with the other corner.
        9. Repeat this entire process with the inside of the bag.

          E. PIECING BAG TOGETHER

          1. Turn the outside fabric right side out and lay flat.
          2. At the opening, measure 2" from each side seam and mark with pins.
          3. Taking one strap, lay the ends on top of the outside bag body on the inside of the pins you just used for marking.
          4. Pin in place (only through the one side of the bag).
          5. Do the same thing with the other strap on the other side of the bag.
          6. The ends of the straps should line up even with the edge of the bag.
          7. Make sure that the fabrics that are facing each other (on the straps and the bag body) are the same, otherwise when you make the bag, you will have opposite fabrics on the straps than the body. Make sense? It will.)
          8. Carefully stuff the outside fabric bag and straps into the inside fabric bag, matching up the bottom corners
          9. Match up the side seams, folding the SA in opposite directions and pin in place.
          10. Repin the straps to both layers of the bag. Make sure that the straps are fully inside/between the two layers.
          11. Pin the two bags together in the middle of the straps.
          12. Starting at the back of the bag (I used the side with the larger pocket), sew a 1/2" SA around the entire top of the bag, leaving a 2 1/2" opening where you started (E.12.a). Make sure to backstitch at the beginning and end!! I also backstitch when I sew over the straps to make them a little more sturdy.
          13. Pull the inner bag out of the outer bag (makes it easier to turn if they are not together) and Turn right side out through the opening.
          14. Push the inside of the bag into the outside of the bag, wrong sides should be facing each other.
          15. Press the top where your fabrics are sewn together. Turn opening in 1/2" and press.
          16. Now sew around the entire top edge of your bag with a 1/8" SA, making sure not to sew your straps down (make sure they lay out like in the photo).
            YOU'RE FINISHED!! :)

            the green bag has wider straps. 
            I sewed them with 1/4" SA, whereas the blue/red bag is sewn with 1/2" SA.


            *a few tricks: I despise ironing, so I actually just finger pressed everything in this project. Though I do iron the fabric before I cut it so that the pieces are all straight and the right sizes.
            This pattern is very general. You can use it with any variations to make any size or style of bag you may like. Add embellishments or pockets to the outside before sewing the bag body. You can sew multiple fabrics together  for a multi pattern/fabric bag. Etc. The possibilities are endless!
            Here is are two examples of bags that I made practically the exact same way as this one, just bigger and with a few more details:

             
            This second bag only has the "one" strap sewn in at the side seams. I actually used two straps, only sewing in one end of each, with pointed ends and then tied them in a knot at the ends so you can adjust the length.


            Now all you have to do is fill with whatever fun stuff you want, or wait until Part 2 for some ideas, and you are set! :)

            If you have any questions, or something doesn't make sense, 
            Leave a comment and I WILL get back to you. :)